Wednesday, November 24, 2004

Minced (Deer) Meat Pie

Nakatikim ka na ba ng usa? Si Pareng Joe of NJ, nakatikim na. We are going to exchange packages (he has just sent me a package of goodies from a Filipino store, and I will send him BBP pickles and empanadang minced deer meat.) But this post is not about tapa.


In this state hunting is one of the activities many people engage in, but they have to get a specific (as in turkey, doe, buck) license for that, aside from the license for carrying guns. My friend also told me that they do lottery for hunting.


My husband is fond of collecting guns, but hunting has never been appealing to him. His brother and his wife, though, like the outdoors, that the couple usually fish and hunt during the seasons.


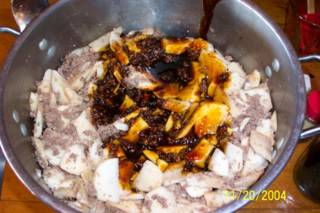
Recently, my BIL shot a buck at the neck. They cleaned and slaughtered it and I had my supply of deer heart (which I cooked using Sassy's barbecued gizzard recipe. 'Twas good!) and liver.


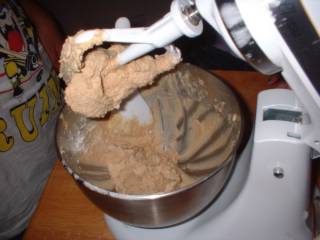
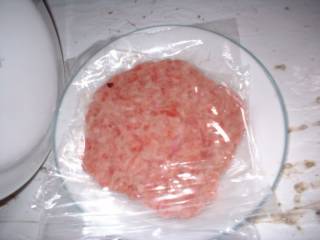
My MIL cooked the neck for five hours, then patiently separated the meat from the bones and ground it, ending up with 7 quarts of deer meat, which she cooked to make "minced meat". I was invited to witness how to do it, the message being carried to my by my dear hubby (and I noted a hint of excitement while he was asking me whether I wanted to see how his mom does that). I told hubby I knew what mincing was, but was minced meat something that referred to a process of some sort? Yes it was, he said. Of course I was eager to see what minced meat was. I am just too eager to discover more about foods that my hubby enjoys.


Ingredients:


The proportions will all depend on how much ground meat you have.


ground previously cooked deer meat

apples (we used Cortland)

raisins

molasses (They said that in the grocery stores is no good. They get theirs at Agway here, which sells molasses dispensed from a bucket. One has to bring his own jar. $2/qt.)

salt

ground cinnamon

ground cloves

ground allspice

cider (Hubby said apple juice is cider minus the pectin content.)


Instructions:


Measure the meat.

Peel and slice the apples. It should be double the amount of minced meat.

For every quart of meat, measure 1/2 of 15-oz box of raisins. Ground 3/4 of this and leave the rest whole.

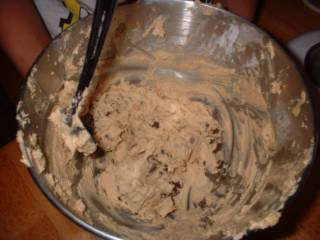
Combining them altogether, add the spices as follows: For every 8 qts of the meat-apple-raisin mixture, add 1 cup molasses, and 1 tsp each of salt, cinnamon, cloves, and allspice.


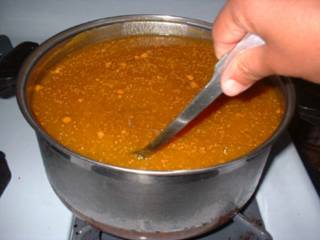
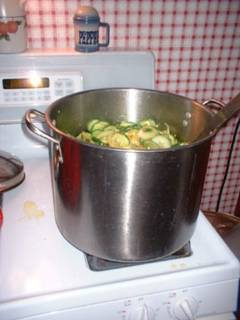
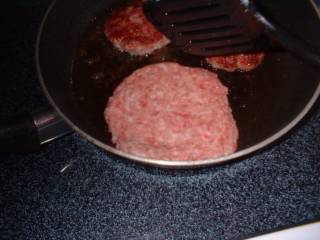
Cook everything together in a stockpot over low heat, intermittently stirring for even cooking and to avoid scorching.


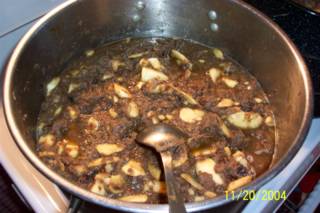
Add cider from time to time to keep the mixture moist.Continue simmering (and stirring) for about 2 hours (personally I think it can be done in one hour, as soon as the fruits are cooked and the flavors have mingled.)


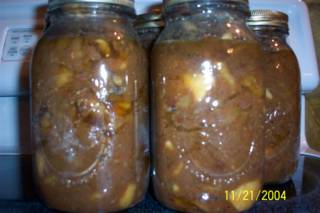
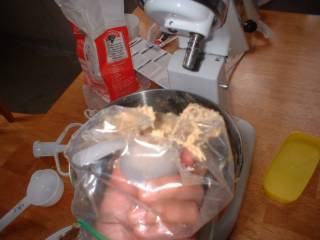
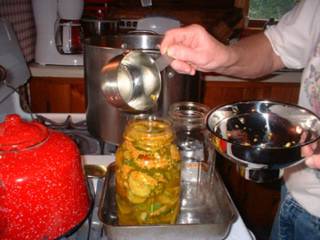
MIL processed the quarts in a boiling-water canner for 40 minutes (My MIL let me go home, thanks to her! ) then told me to just have my hubby pick up some of them, because I told her I wanted to try to make the minced meat pie as soon as it was done.


So I did. According to her, she puts pieces of butter on top of the minced meat before putting the top pie crust.


Learning more about making fancier edges, I pressed the overhangs (I left about an inch from the edge) of the two pie crusts together, tucked them under, then using my fingers, created waves like so. Then I made slits on the top using a knife, wiggling the knife while still through the slits to make them wider, so that they would not appose again (In my first attempts at slits I was too hesitant with them, then they almost closed off!)


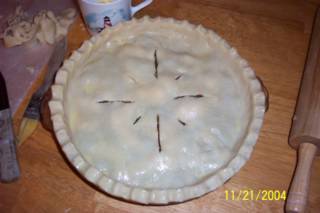
As usual, I brushed the top with my egg-sugar combination for that golden crust. However, maybe my sides were too elevated (especially against the not so high pile of the minced meat) that they got too browned (I have none of those aluminum pie edge covers, and I was too lazy to improvise with the use of ordinary aluminum foil. I was thinking that nobody in the family really cares about the edges. They only like the filling and the thin crust. I am the only one who really cares for the crust, more for that than the filling.) So here you can see almost-burnt edges. (I remember a time when I tried to make the edges lower than that of the pie plate because I had not enough filling; during the initial stages of baking, when the fat melted, the dough slid off the sides! I stopped it immediately and saved the filling then made another pie crust. It was for a pie version of leche flan. I was experimenting to make an egg pie of some sort.)


This was what was left when I remembered to take a photo 
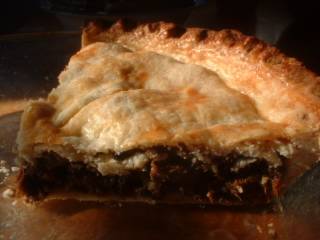
of the sliced pie. The warm pie was runny. This one is cold already, so don't be fooled. We like the pie served warm with vanilla ice cream.


I prepared this pie the next day for supper, after having told my hubby about my plan. Then when I called him to the table with the pie and the ice cream there, he asked me. "What's for supper?"

I was puzzled. I said "That," pointing to the pie.

"Oh, you're not serving anything else? Because we eat Minced Meat Pie as dessert."

I said (I felt I was blushing), "I didn't know that...to us Filipinos, that could already count as a complete meal by itself, or a very heavy snack."

He shrugged, and savored it anyway, saying later that my pie crust is the best (despite the burnt edge! Haha!), and that the pie was indeed filling and delicious! (of course the credit for the filling goes to his mom).

My personal opinion on Minced Meat Pie: While it was good to discover new recipes traditionally prepared by my in-laws' family, and discovering a meat-fruit combination that my hubby actually likes (surprise! surprise!), I still prefer the chicken empanada. Maybe it's just because that's what I grew up with (and what he grew up with).

We're gonna have this on Thanksgiving, to be held at my SIL's house. But my MIL will be the one to prepare the pie. Walang nakatoka sa akin. Pero lagot ako sa Christmas. Dito naman kami sa bahay namin. Ngi! Posted by Hello


Saturday, November 20, 2004

Original Nestle Toll House Chocolate Chip Cookies

I remember the first time I tried to bake, it was Herbed Rolls, a kind of yeast rolls, which was in no way considered to be a good starting point for newbies. From my readings about baking, cookies are usually the first attempts at baking, as the process is "simpler."


So I searched for a recipe for making cookies. My attention was caught by the recipe title "Out-Of-This-World Oatmeal Cookie," plus it had the promise of being healthy by virtue of the oatmeal content. I followed the instructions, down to "drop by teaspoonfuls onto an ungreased cookie sheet." I ended up with tiny hard and tough crunchy cookies that everyone in the family tried and never got a second helping of. Including me. I kept the 4 dozens of cookies in jars and cans, not wanting to throw them away...until the cans and jars were all covered with dust, then I tried them again in the hope of liking them this time...but no.


I finally had the will to throw them into the trash can. And now, after probably a year after that first try with cookies, I have again gathered enough courage to try, this time, the Nestle Toll House Chocolate Chip Cookies. At first I tried making half a batch (half the recipe), so that in the event that the turn out was not that good, I would not have dozens to throw away.


The first photos here show the ingredients for half the recipe. The photos starting from the scooping of the cookie batter to the baked finished product show my second batch of the same recipe. The first half I made were good enough but not quite good to me: they were not too small, but flat and looked so plain (no choco chips showing on top). Soft yet crunchy nonetheless. With the second batch I made some experiments in the process (I also encouraged the kids to take part), and the results were what I yearned for.


Ingredients (whole recipe, found at the back of the package of choco chip morsels):


2 1/4 cups all-purpose flour

1 tsp baking soda

1 tsp salt

1 cup (2 sticks) butter, softened (microwave for 10 seconds)

3/4 cup granulated sugar

3/4 cup packed brown sugar

1 tsp vanilla extract

2 large eggs

2 cups (12-oz pkg) Nestle Toll House Semi-Sweet Chocolate Morsels

1 cup chopped nuts (optional; I made some with nuts for myself; kids and hubby don't like nuts)


Instructions:


Preheat oven to 375 deg F.


Combine flour, baking soda and salt in small bowl.

Beat butter, granulated sugar, brown sugar and vanilla extract in large mixer bowl until creamy.


Add eggs one at a time, beating well after each addition.


Gradually beat in flour mixture, stopping from time to time to scrape the sides and bottom to ensure uniform mixing.


Stir in morsels and nuts, reserving about 1/2 cup of the chocolate morsels.


Where the recipe called for "dropping by rounded tablespoon, I used a plastic measuring cup lined with sandwich bag to scoop out and shape the cookie dough. If you have a cookie scoop, that will be easier to use. (Sorry na lang ako, wala pa ako nun. And it's not something I would buy when I can improvise.)


Drop the cookie batter to form a mound like so (it was a mound only a bit smaller than that of ice cream scoop, with diameter the same size as the circle made with your thumb and middle finger apposed together. And though here I used an ungreased baking pan, later I experimented using wax paper to line the pan. The advantages of wax paper will be apparent in the subsequent steps. Imagine the mounds to flatten and approximate the space it would need for the expansion. Avoid crowding the cookies on a pan.


Place the remaining chips on top of the cookie mounds as shown above. This step would result in more appealing cookies when baked.


Bake for 10-12 minutes.


As you can see, as the mounds heat up, the butter melts and the mounds become flatter. The chips on top also become distributed.


Before the end of baking, the cookie is already flat as shown below. This results to big cookie(make a circle with your two thumbs and two middle fingers, that's the size of these cookies), which is crunchy on the underside and at the periphery while chewy at the centertop -- just the way we like it. Even my husband could not give up his last cookie for his daughter who wanted more. (Hence, the very next day I baked again, and this time making a whole batch, resulting to 22 big cookies. This is also one way that I try to establish good memories for my stepdaughter during her infrequent visits with us.)


When done, allow to cook in the pan on a wire rack for 2 minutes.


Then transfer the cookies to cook completely on the wire rack for about 10 minutes.(I did this then using a spatula when I had no wax paper lining. The cookies were very pliable and a bit sticky. Hence I thought of using wax paper on my subsequent tries. Not only did it solve the sticking problem, but also transferring all the cookies at once was a breeze! No hassle in cleaning the baking sheets either and no danger of scratching the finish, since I only had to clean the oil off with hot soapy water. Maybe aluminum foil will be better.) Here I held one cookie to give you an idea of how big the cookies were. One cookie is equivalent to 4 small cookies. One piece was enough for snack with a glass of milk (I can actually eat only half of it for snacks.) The kids loved it. My hubby's crazy about it. So this is now among the favorites. I am not sure if I will try other cookie recipes. We tend to stick with what we find really good.


Now because of this post I got curious to visit the Nestle Toll House website and found a webpage with step-by-step photos and a video explaining how to make it! Now is this post a complete waste of time and effort???


I Love Chocolate Chip Cookies! Surely this will be a year-round tradition to make good memories with the kids.


Monday, November 15, 2004

Canning BREAD & BUTTER PICKLES

Last winter my dear MIL gave me a quart of this BBP. (She gave me a jar of dill pickles prior to this.) She said her husband likes it so much that he can finish the whole quart in two weeks, and that he can't eat any roasted meat without it on the side. I tried it right away, and that day I decided that I had a new favorite pickle. The closest Filipino pickle that tasted like BBP is the atsara, but my! This one is a lot better! (I have tasted several atsara preparations in the PI, some with carrot slices, some with bittermelon slices (ugh!), and some just the grated papaya with onions and the brine. The best atsara I have tasted was the one that went along with Baliwag lechon manok, if my memory serves me right.)

And last summer when it was harvest and canning time for the cucumbers from my vegetable garden, I was so eager to learn how to make BBP. I first learned canning the dill pickles first, which was harder and fussier when it comes to processing (have to maintain at a point just below boiling). This one is way too easy...just half-cook the cucumbers and can. No more processing needed! The pure vinegar-sugar combination (as in no water) does not encourage growth of Clostridium botulinum and other microbes while the jar is not yet opened.

Browsing some websites about BBP, I learned that many required other ingredients not in this recipe from my MIL's canning book. Some required processing in a boiling water canner. MIL says you can't buy these at the grocery stores, and if ever you find one, they are not as good as what we are making. She first had a taste of this from a friend who shared with her the recipe.
Others are just so mushy and not as pleasantly tasting as these.

So, for Filipinas who are planning on planting cucumbers next summer, you might want to make these pickles. Your hubbies might prefer the dill pickles (as mine does), but you will surely love this if you love atsara. Now for American wives to Pinoys, if your hubby likes atsara (pronounced ah-cha-rrra), they will surely appreciate this. For Filipinas in PI, you might want to try making these as substitute for atsara. Best served with roasted chicken. Also goes well with burgers.

Equipment:

knife
chopping board (better if you have a mandolin or a slicer either in food processor or as attachment)
nonreactive stockpot (stainless steel)
Jars and closures
magnetic picker
wide stainless steel funnel

Ingredients:

25 pickling cucumbers
8 fist-sized yellow onions (or the equivalent amount)
2 red and green bell pepper (1 each, or 2 bell peppers plus 1 small jar of pimento)
1 cup canning salt

For the brine:
12 cups sugar, dissolved in
12 cups vinegar
1/2 cup mustard seed
6 tsp ground turmeric

Instructions:

I did this in two consecutive days.

Day I: Preparation


Do on the same day of harvesting for optimum result. Wash cucumbers well. Remove ends. Group the cucumbers into 3. Slice the first group to the desired thickness (I like mine about 3/16 of an inch). Divide the onions into 2, slice into rings. Divide the peppers into 2, dice and discard the seeds.


Layer as follows: cucumbers; onion+peppers; cucumbers; onions+peppers; cucumbers.


Sprinkle 1 cup of canning salt on top. Cover and let sit overnight. The salt draws the excess moisture from the cucumbers, so that it will retain its crispiness even when canned.


Day 2: Canning

As usual, before proceeding, prepare jars and closures according to instructions in Canning Basics.

Next morning, rinse with cold water and drain. Taste cucumber. Rinse again and taste again. Repeat until the cucumbers are not that salty to your taste (just a bit).


Prepare the pickling solution and boil for 5 minutes, stirring constantly.


Pour into the stockpot of cucumbers, and heat near boiling point, stirring constantly to assure uniform cooking.


Bring back to heat up to just below boiling point and maintain, stirring every 2 minutes or so to assure uniform cooking.


Slices should become translucent. Check for doneness by trying some slices from different spots in the pot. Cucumbers should be just half-cooked and still crispy. Lower heat to the minimum to maintain heat yet not overcook the cucumbers.


*Using wide-mouthed funnels, transfer to hot jars right away, with a good proportion of pickles to brine solution, making sure all slices are covered. Leave a 1/2-inch headspace.


Make sure all slices are covered in brine. Leave 1/2-inch headspace.

Release bubbles with a plastic spatula or a bubbler, wipe rim with damp cloth or paper towel, and close immediately with clean lid and screw band. Put on a sterile towel.**

Repeat steps *-** in one smooth flow jar per per jar, stirring again before ladling. Don't fill all the jars then proceed with covering because this will not be processed in a boiling water bath. (the pure vinegar-sugar combination makes it less prone to developing botulism and is less susceptible to bacterial/mold proliferation. For every new jar filled, stir the pickles, with the heat kept to the minimum to avoid overcooking yet maintain the heat, before ladling into the hot jars. After all jars are filled, cover with another towel. Only then can you allow open windows/draft. Wait for at least 3 hours for popping sounds when sealing. After 12 hours, take note of unsealed jars and place in refrigerator, to be consumed within 2 weeks. For the properly sealed jars, let sit in the pantry (should be dark and cool) for at least three weeks to further develop the flavor. Unopened jars will remain good within 1 year from canning.

This is now my favorite pickles (hubby's fave is the dill pickles) because it comes closest to the taste of the atsara that I liked, even better. I use this with any dry (not soupy) dishes, or when hunger strikes and I am not in the mood to cook and there are no leftovers to raid in the fridge. Now I am planning to turn them into holiday gifts for the few friends that I have made in the past year.

Do you want more ideas about pickling cucumbers? Click here. Posted by Hello

Friday, November 12, 2004

Lumpia

This is nothing new to Filipinas...


Recently CeliaK posted about how to roll lumpia. Then I think it was in WK where I complained that I can't find any ground pork at the nearest grocery store here (I did not like the beef that much). And someone suggested that I just buy pork and request it to be ground or I can just do it myself. Since I have no grinder yet, I was a bit disheartened. Then after having about a cup of leftover pork sausage an idea sparked. I tried to use it in lumpia. And in my most recent post, Cerridwen commented about how her mother cooked Filipino foods using American ingredients, and suggested that I can make use of the pork sausage for bola-bola. What a wonderful idea! She gave other tips too.


My usual ingredients in the usual proportions are:


Egg Roll Wrappers (Nasoya is the only available brand here, which I don't really find as good as the lumpia wrappers in the Philippines. I tried to make some before, using Sassy's instructions, but maybe my skillet or the stovetop was not right. I got discouraged after 5 attempts.)

1 cup Ground Meat (pork sausage in this post, may be beef, or the flesh of steamed fish, or minced chicken or even minced shrimps)

Chopped Vegetables (usually 3 cloves garlic, half an onion, half a medium carrot, 3-5 sprigs parsley, 1/4 cup green beans)

salt and pepper to taste

1 egg (for coherence)

2 cups cooking oil for deep-frying (when available, I use the oil from fat back (?) )


(Proportions may vary from person to person.)


Instructions:


Chop all veggies together.


Mix the chopped veggies with the pork sausage, egg and salt and pepper to taste (not too much because pork sausage is already flavored.


I cut my wrap in half to have triangles (because they are big). I put the mixture like so, about the size of middle finger and as thick as the thumb. Finger size lumpia allows me to cook them to crispy golden brown without undercooking the meat.


Fold the sides over the mixture.


Roll tightly. Wet the sealing edges with water or egg to make it sticky. (Doesn't really have to be egg or a flour-water mixture, as the wet wrapper will become sticky when wet.)


Arrange them with wax paper between layers to prevent sticking (mixture might exude fluid that will cause stickiness). This can be frozen or consumed right away. However, with this type of wrapper, frying the frozen rolls result to dark brown color, which is not too appealing. Thawing just makes it sticky and soggy appearing. I liked it better when cooked right away.


Deep-fry in medium saucepan with about 2 inches oil heated to smoking point and kept on high. (Or if you have a deep-fryer, maybe it will work better. I don't have one.)


Rolls should be placed one by one with enough interval to partially cook (about 5-10 seconds) the wrap before another is placed into the pan. This avoids sticking with one another. After several minutes the rolls will start to rise. Wait til it turns golden brown before removing (about 5 or more minutes).


Drain on paper towels.


I love serving lumpia with vinegar dip (made of 1/4 cup cider vinegar with salt, red and black ground peppers to taste and 1 crushed clove of garlic. The kids like them with ketchup. Hubby does not care for it because of the veggies it contains. Oh well, I just wanted to satisfy my craving for lumpia... In the past year, I have made this only 3 times, and an individual eats only about 3-4 sticks. Not bad...(just shake the guilt off by doing jumping jacks during commercial breaks while watching TV.)


I even crave for lumpia with togue (bean sprouts), but kids don't like them that much, and I still have to experiment sprouting my own beans. Another lumpia I miss is the fresh lumpiang ubod, which makes use of the core of a young coconut tree, if I am not mistaken???, dipped in peanuty-garlicky sauce. I have never tried making that.


And sometimes I tend not to post anymore some Filipino recipes that are so common that they don't really seem exciting to post about, but then I think of some American friends that I have met both online and in person who ask me to post more Filipino dishes, so I persist...Posted by Hello


Wednesday, November 10, 2004

Pork Sausage

When my friend Ana had their pig slaughtered, it was mostly processed into hams and sausages. She gave me several sausages. One whole of which can make 7 patties. My family could only consume about 5 patties. I usually prepare it for breakfast with scrambled eggs and toast.


At first I did not quite know how to prepare it. To me, sausages meant hotdog-shaped ground meat (like the German sausages that I loved). The first time I ordered a sausage during a breakfast at Friendly's I was surprised to see a disk. Anyway, before I proceeded with this I had to ask my hubby how it was prepared.

Pre-heat a heavy skillet on medium setting for about 5 minutes. Lightly grease with oil. (The sausage will render a lot of oil as it cooks.) Meanwhile, shape the sausage into patties. This is how I do it:

Using two sandwich bags as my gloves and for easier handling of the ground pork, I first shape it into a ball, then flatten it a bit with my hand.


Then using a small plate I press it against another to flatten it to about 1/8 inch thickness, still sandwiched between the bags.


Then I gently peel off the plastic, transfer to a spatula,


then gently lower it onto the skillet. I cook the first side for about 7 minutes, and the other for about 5 minutes. The patties will significantly shrink in size.


Drain on paper towels and serve with scrambled eggs (My hubby prefers eggs with just salt and pepper, no veggies. Me and my sons like it with diced tomatoes and onions, plus garlic powder.)

I usually have about 1 cup of leftover uncooked sausage. I tried to use it to make lumpia. Posted by Hello


Custom Search