Tuesday, September 28, 2004

Canning TOMATOES - WHOLE, HALVED OR QUARTERED (Packed in Own Juice)

The method presented here deviates from what is in the canning resource links, where they use citric acid or lemon juice to increase the acidity and decrease the likelihood of botulism. Also, it eliminates the bubble removal step. My mom-in-law had 40 years to defend her method, saying that just in ensuring the cleanliness of the tomatoes, the materials, and the hands, and thereby minimizing the contamination, the risks of food poisoning are prevented. And I agree with that. It is essentially the same thing you should do in treating wounds to avoid infection.

Ingredients:

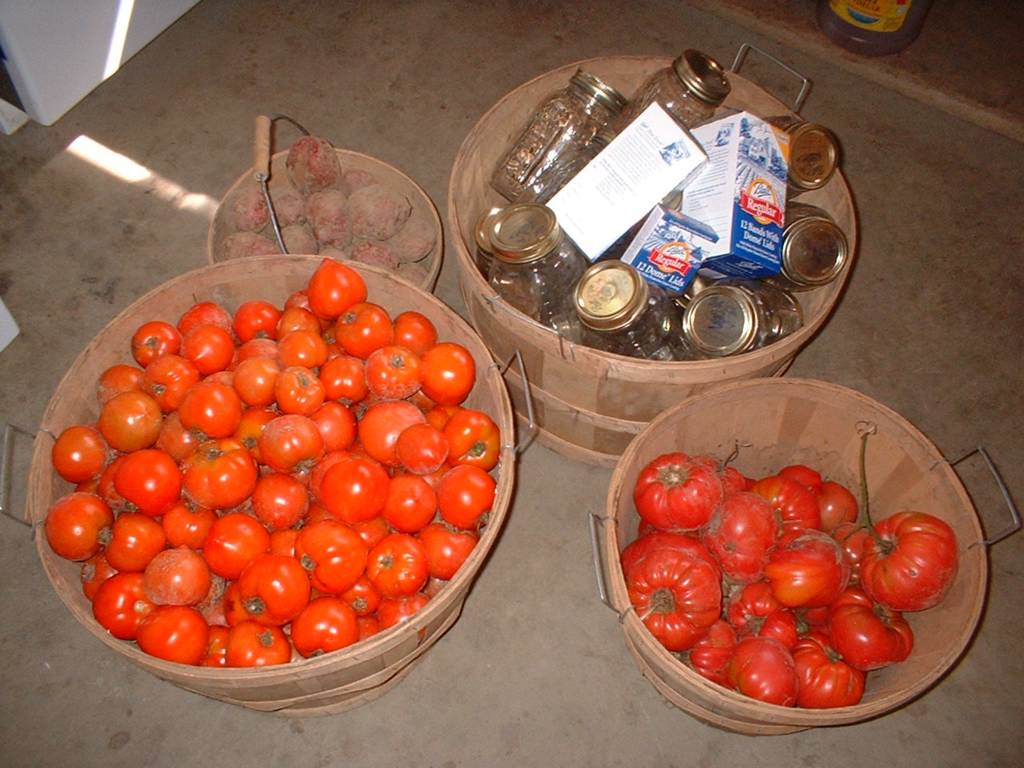
Tomatoes (I used 8-10 of these medium-sized tomatoes per quart jar)

Instructions:

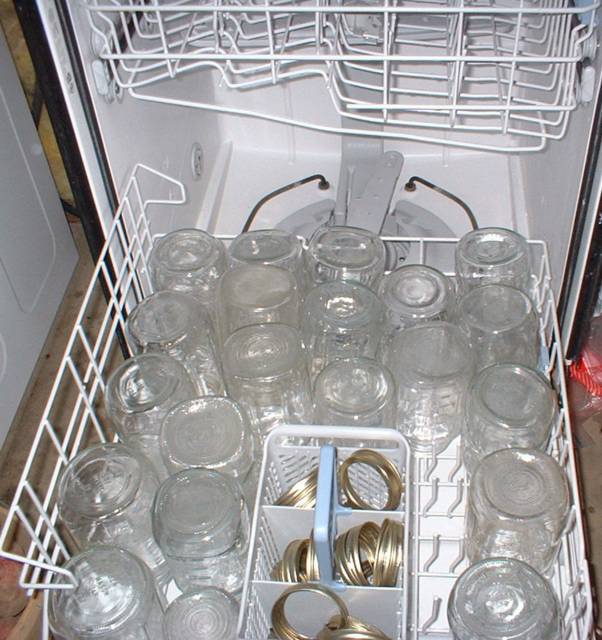
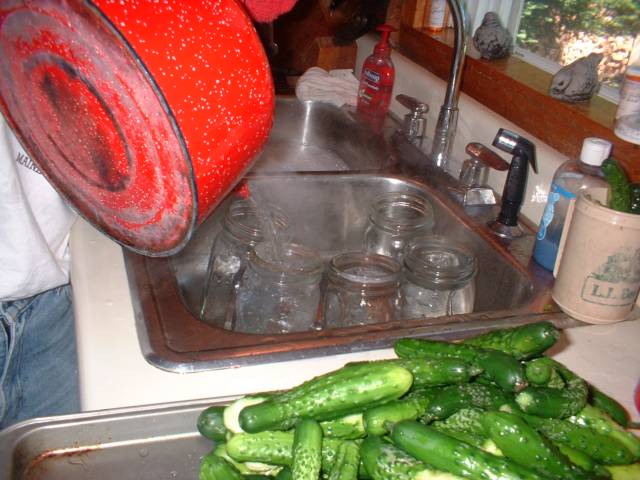
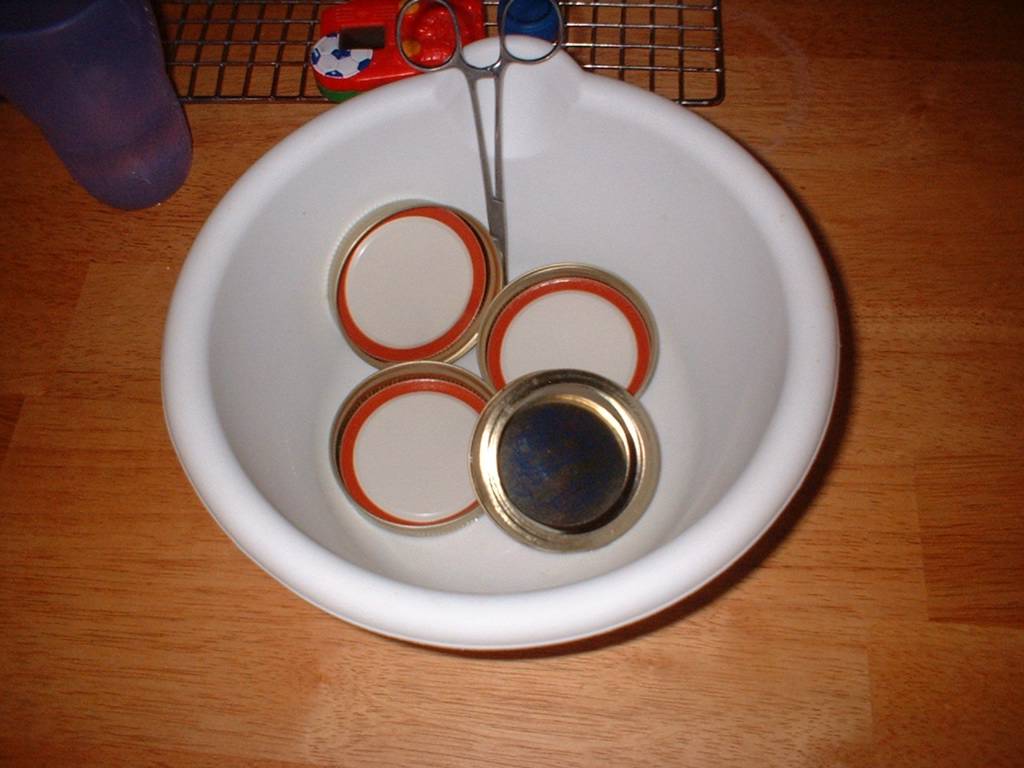
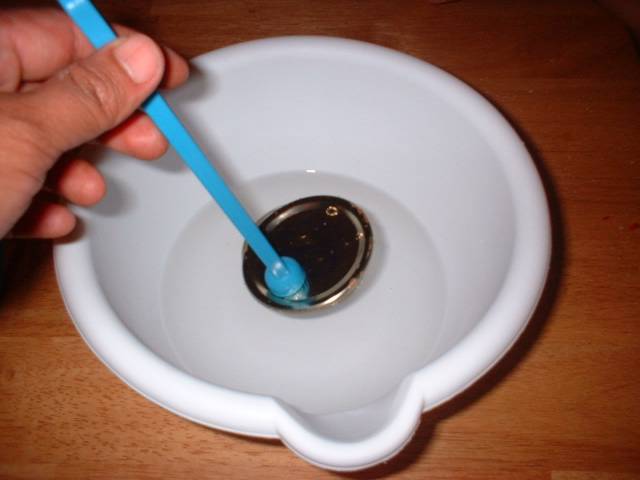
Before starting with the produce, always wash the jars first with hot soapy water, then fill to the brim with boiling water. Empty just before filling with the produce to be canned. Some recipes call for the jars to be sterilized. Procedure for such sterilization techniques are also provided for in the canning links. During the whole procedure, refrain from touching anything aside from the produce and canning materials. Whenever you have to touch other things (e.g. camera, canning book, your hair or oily face, etc) or if you have to go to the bathroom, always wash your hands again before going back to canning.

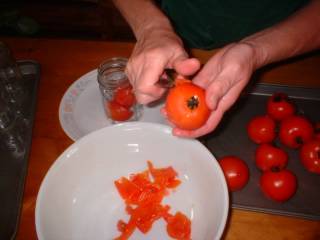
1. Wash tomatoes. Dip in boiling water (blanch) for 30 to 60 seconds or until skins split, then remove.

2. Slip off skins; trim away any green areas; cut out core. Leave tomatoes whole or cut into halves or quarters, depending on size.


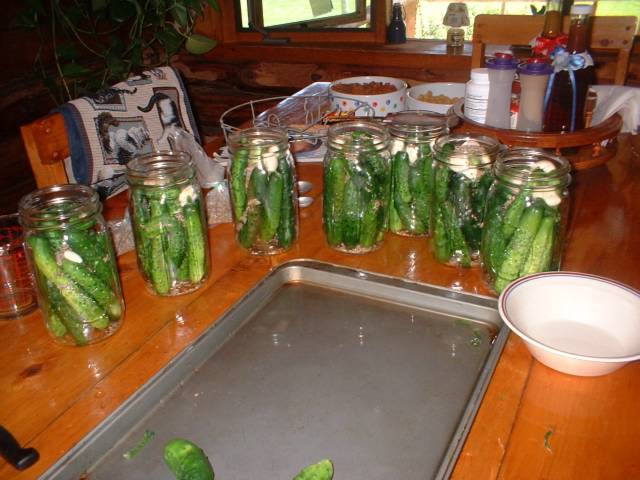
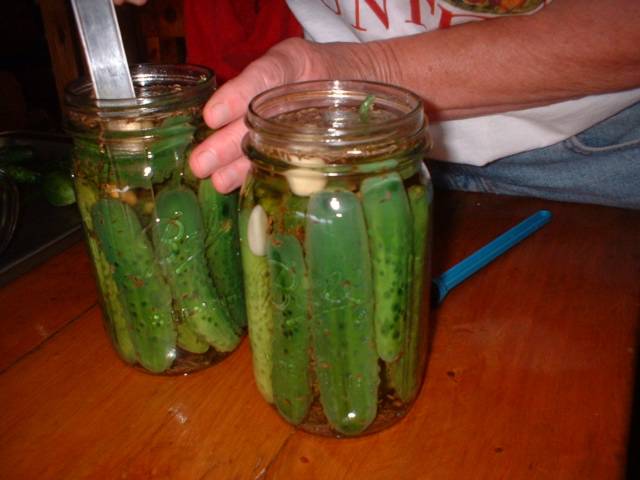
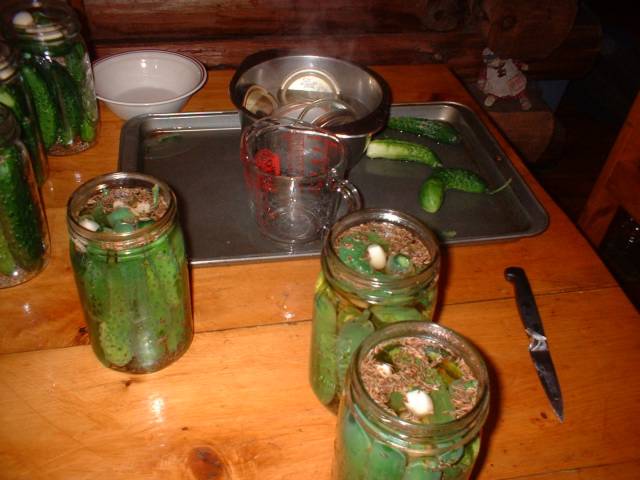
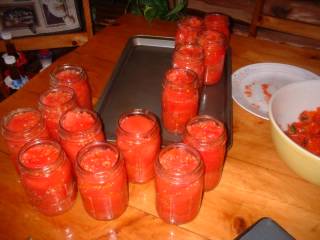
3. Pack tomatoes into hot jars until space between tomatoes fills with juice, leaving 1/2-inch headspace. (Don't be afraid to push the tomatoes downward; just make sure your hands are clean.)

4. Wipe jar rim clean with clean damp cloth or paper towel. Place lid on jar with sealing compound next to glass. Screw band down evenly and firmly until a point of resistance is met - fingertip tight.


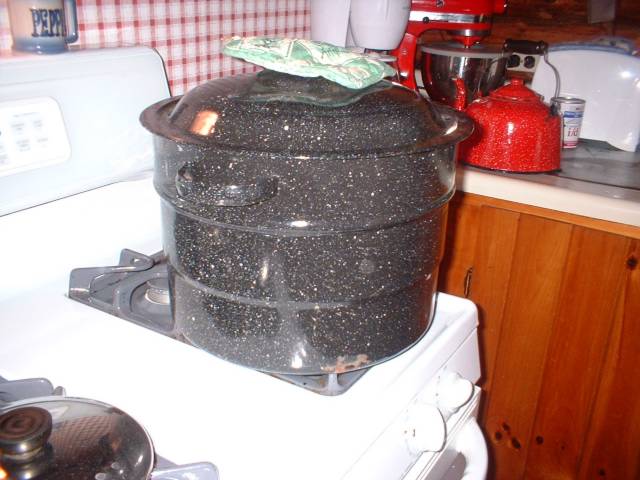
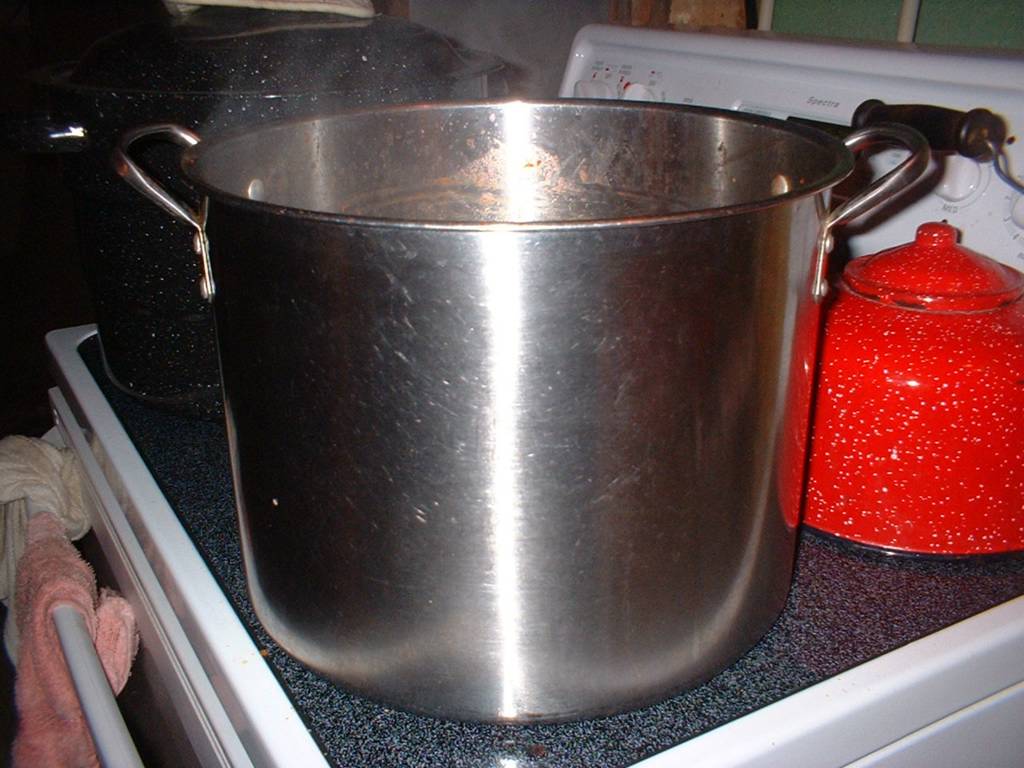
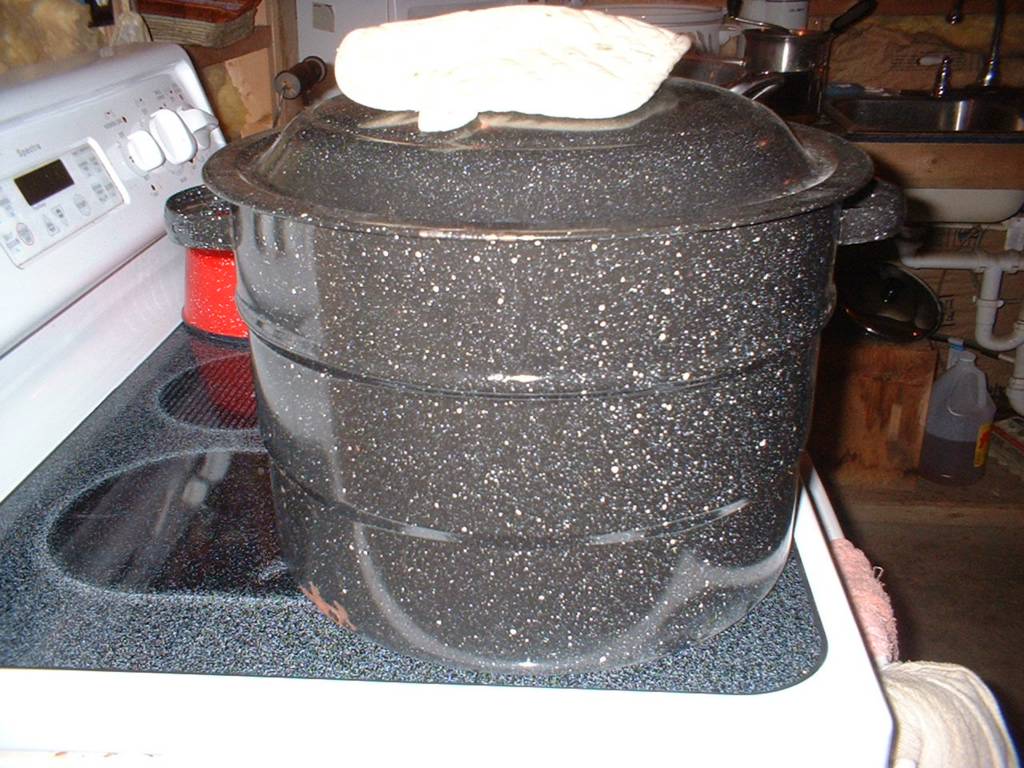
5. Process pints and quarts 1 hour and 25 minutes in a boiling-water canner. (That's as per Canning Resources' procedure. Start timing when the water has boiled vigorously. You can lower the heat as long as water continuously boils vigorously.) Avoid opening the canner while processing; otherwise, you lose heat everytime.

(My Mom only processes her pints 30 minutes and the quarts 40 minutes. Never had any problems with that shorter time. We figure it must be that she properly observes sterile technique in canning.)


6. Upon processing. carefully lift the jars out of the canner one by one, avoiding banging the jars with one another (which can crack the very hot jars).

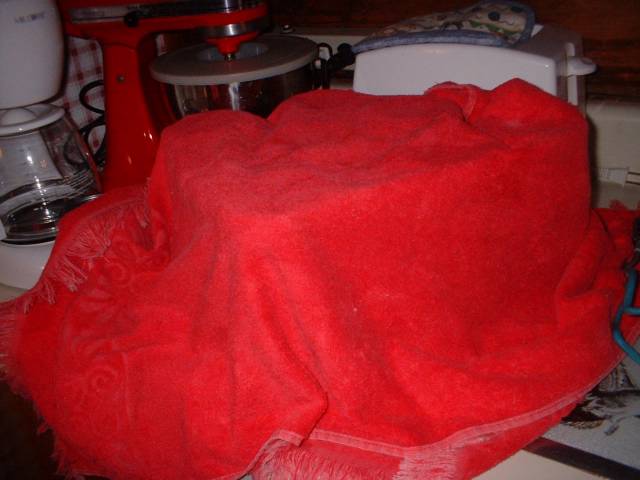
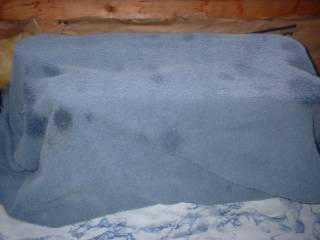
7. Place the hot jars on a towel at least 1 inch apart.


8. Cover and LEAVE ALONE for at least 3 hours, after which you can check for proper seal. (Those which did not seal will have to have their lids replaced then reprocessed, or store in the fridge and use within 2 weeks. You may also opt to freeze, then thaw before use for cooking.) Don't move them for at least 12 hours after processing.

9. After 12 hours or so, label them ("Tomatoes - whole, packed in own juice, [date]") then store in a cool and dark place and use within one year.


These tomatoes can be used for recipes calling for stewed tomatoes. My in-laws and hubby always called them stewed tomatoes, although now, after educating myself about canning, I realized they are not so. We have used these for lasagna recipes, for caldereta, fish sarciado, escabeche, and other yummy tomato-based dishes. I have also used it for making sweet-and-sour sauce, substituting it for water and tomato paste called for. When I have leftover mac&cheese, I reheat it with half a jar of these tomatoes, then add leftover sauteed ground beef. It sure is advantageous and cheaper to have access to these tomatoes from my pantry rather than having to go to the grocery store once a week to grab 5-10 fully ripe tomatoes for once- to twice-weekly tomato-based dishes. The best thing is, I know how the tomatoes were raised, how clean they were processed, and how healthy my canned goods are.

Thursday, September 23, 2004

DOST's Tekno Tulong

This link (click on the title) was provided to me by Bernice (foodblog link at my sidebar). During the time that I checked on it, the page could not be displayed, probably because it was still under construction. It is still is, but today, to my elation, there are now five pages of the Pilipino version (complete) and two pages of the English version. I checked several of them, and was so glad to have found out treasures like how to make "Itlog na Maalat," "Longganisang hubad", chicharon, etc., etc. Wow! What a treasure.

It might not be that useful to the Filipinos living in the Philippines (although the availability of such knowledge might lead some Filipinos into considering other sources of income), but for me who is living in a place where Filipino products are available only at a place two-hour drive from our house, that is sooooo EMPOWERING! Considering that I have at certain times the raw materials for such favorites as mentioned above, and that people here don't have a clue on how these are made, this is definitely another treasure on the net.

I have to thank Bernice for that link.

Tuesday, September 21, 2004

Canning DILL PICKLES

The Dill Pickles were one of those cucumber pickles which Mom gave to us during my first year here. They are my hubby's favorite pickles. Though my favorite cucumber pickle is a different one, I made these for my hubby, of course! But it came as a surprise to me to see my older son enjoying them as well (as in, he had these during breakfast, lunch and dinner on the first two days upon making them).


Since the first bountiful harvest came from the cucumber plants, they were the first vegetables that I canned. We searched for the 4- to 6-inch long young cucumbers and filled a small basket with them.


Before trying to do this, please take the time to read the Canning Resources links on the sidebar.


See the printer-friendly copy.


Ingredients:

For each quart, use 8-10 cucumbers, 4 garlic cloves and 2 teaspoons dill seeds.
For the brine, use 2 qt water: 1 qt cider vinegar (5% acidity) : 3/4 cup canning salt

Instructions:

Wash all jars and screw bandswith hot soapy water, or you can wash them in the dishwasher.


Prepare the boiling water canner by filling it up halfway with water without the rack and boiling it while you proceed with the other steps.


Pick 4- to 6-inch long cucumbers. Wash very well. Look for spots that show spoiling. If there are any, scrape or slice them off. Set aside.


Boil enough water to cover the jars and lids and screw bands. The clean jars should be filled with boiling water, to be emptied only when ready to fill with cucumbers.


Remove the hot water from the jars using a jar lifter, pack well with cucumbers (you may try to squeeze in the cucumbers upright) then add 4 cloves of garlic plus 2 tsp dill seeds to each quart (jars should be the wide-mouth type for easy packing of cucumbers so that your hand can reach into the inside).


To prepare brine, mix 2 qts water and 1 qt vinegar . Boil. Add 3/4 cup canning salt, mix to dissolve. (Increase the proportion according to the number of quarts that you have filled with cucumbers. ) Pour into the jars immediately.


Using a non-metallic spatula or a bubbler, remove bubbles by gently poking into the inside of the jars. Wipe the rim with a clean damp cloth or a paper towel to remove seeds or anything that might interfere with sealing.


Lids and screw bands should be submerged in boiling water (not boiled, for it will damage the sealing compound, resulting to poor seal). Pick up with a clamp or magnetic picker whose tip/s were/was also submerged in the boiling water prior to using. To minimize contamination, refrain from touching the side of the lid that will touch the contents of the jar.


Close the jars fingertip tight then load onto the canning rack.


Lower them into the hot water. If water tends to overflow, remove some. Leave enough to cover the jars up to 1 inch above the lids. Turn heat to high and cautiously watch until the water gains enough heat to the point just before boiling (If it boils, lower the heat immediately) then start timing 15 minutes. Never allow to boil as this will COOK the pickles and will result to mushy, not crunchy, pickles.


Process for 15 minutes, never leaving it to ensure that the water does not boil. Otherwise, your pickles will be mushy instead of crunchy. (Yuck!)


While processing the cans, have a dry towel ready on the countertop near the stove. Close all windows and doors to avoid drafts (the sudden rush of cold air might crack the hot jars. Then after 15 minutes , one by one, carefully lift the jars (with a jar lifter especially designed for canning) out of the rack without banging them with one another (this might crack the jars as well). Place on top of the dry towel. Leave at least 1-inch space in-between the jars. Then when all the jars are out, cover with another towel. These towel will provide cushion for the hot jars not to crack when you place them on the countertop, and will also act as "windbreaker" in case there is a draft. You may now open your doors and windows. LEAVE THESE JARS ALONE FOR AT LEAST 3 HOURS before peeping under the towel, and preferably let them cool for at least 12 hours before moving them. You will hear the popping of the lids, which is a sign of good seal. If within 12 hours one or more of the jars did not seal, you may process them again or place in the fridge and consume them first within two weeks.

(Mom told me I should always be there with her during canning, as everything I made were sealed tightly. She would often come up with one or two improperly sealed jars. What a compliment from someone who has been canning for the past 40 years!)


Mom delivered to me my dill pickles the next morning (my son was excited to have his share in picture-taking!). These dill pickles will keep for one year, stored in a dark and cool place (not kitchen shelves nor the window sill!)


Hubby sometimes have these for snacks, or eats them with baked chicken. I have grown to like them because they reminded me so much of binurong mangga (which I learned from my previous mom-in-law using water and salt for indian mango), and has the same taste as the vinegar dressing (vinegar and salt and red and black pepper) which I used to make to dip my green mangoes into. Naglalaway tuloy ako maisip ko lang...

Canning Resources

Before I came here, I had no idea whatsoever about canning. The very first time I witnessed it (during the time my in-laws made maple syrup) I did not realize it was that process.


Then came the strawberry and the raspberry jam-making, and that was my very first hands-on experience with canning and preserves. However, these jams were simpler compared to canning tomatoes and cucumbers in that they do not need processing in water baths to further kill the microbes.


Now that I have lots of vegetable produce from my garden, I have more than what I can consume in a day! At the start of finally harvesting the fruits of my toil, I was quick (out of excitement) to consume a lot in a day...but when everything else seemed to come in huge numbers all at once, I was overwhelmed! I wanted to load up but my stomach could only hold up to 1-2 cups per major meal in a day, and veggies would come in bushels for 1-2 days, not to mention the steady stream at both ends of the spectrum (before and after peak of harvest). I felt the need to preserve these veggies while they were still fresh, so as to avoid/minimize wastage. (I never felt this need during my stay in the Philippines, where most vegetables and fruits are available all year-round.)


The answer was canning. I got my first feeds on canning and other methods of food preservation from friends I met online (bingbing whose tips I posted earlier, and dolly whose tips I will post here), who have been living in the same kind of climate as I do, and have felt the need to learn these preservation techniques. I am quite lucky to have "found" them on the net through this kusina endeavor. Bingbing led me to the USDA guidelines in food safety and preservation, which further led me to other websites on the subject, the links to which I have provided in my sidebar.


So far, dehydration methods have been shared (please see bingbing's tips here). Here's dolly's tips on dehydrating tomatoes:


On tomatoes---if you will have a bountiful harvest, why not sundry them (this

will take 3 sunny days) and when its dry just place them in sterilize jar, pour

olive oil then seal. Or, you can also dry them in the oven in a low oven

temperature (100 deg C) until tomatoes are dry. The only thing about oven drying

them is it will cost a lot of power, so it might be a good idea to buy yourself

a food dehydrator. This is one tool that is a must in my kitchen. I dry peaches,

apple, persimmon, apricots, tomatoes, plum, etc....then I just put them in a

re-sealable bags and store them in the freezer.


For my friends who are seriously considering canning in the future, I suggest that you read first about canning using the resource links I provided on the sidebar. You might also want to check out the USDA extension office for a free copy of their guide to canning booklet.


I would also like to put emphasis on observing the sterile techniques (e.g. wash your hands, sterile-to-sterile principle -- meaning, the sterile will only be touched by the sterile, and don't touch with an unsterile material something that is supposed to be sterile/clean). The timing is also critical: can the produce while they are fresh (the fresher the better; the closer to picking, the better), and do the steps from putting boiling water into jars all the way to processing in one smooth flow. Don't allow the food to cool first prior to processing, as the time of processing also depends on the hotness of the materials to be processed, and cooling the food will encourage growth of bacteria. Other tips and don's & don't are in the resource links.


If you are in a rural are, chances are there have been canners who have stopped doing so (probably old people who are retiring and are in their empty nest stage), so ask around if you have friends for jars and screws. Jars can last a lifetime. Screw bands can be reused as long as they are not too rusty to resist screwing. Lids, however, need to be always new.


Canning can be fulfilling, especially when you see your pantry full of canned goods that came out fresh from your very own garden. It is one step towards a self-reliant living. And the materials are worth investing in (and not quite expensive if you foresee decades of use).


After scanning several of the recipes from the links, I now have plans for my garden next year: more corns, same tomatoes, same cucumbers, less beets, add chili peppers and red bell peppers, add few cilantro and parsley, and add basil. Buy (or ask for gifts) before the next summer canning jars and lids and screw bands, plus boiling water canner, dial- or pressure-gauge pressure canner (for many tomato-based products), bubbler, picker, canning salt and ground spices.


For this year I have only managed, with my produce, canning raw whole tomatoes, pasta sauce, tomatillo sauce, jalapeƱo pickles, dill pickles, pimento pickles, and jams. I would like to try making ketchup and canning cream-style sweet corn next year.

Friday, September 17, 2004

The Food Chain

Be forwarned: This is not a recipe, not a kitchen tip, nor a health and nutrition tip.

After saying grace before meals, my younger son looked at the food on the table and asked me. "Ma, pwede ako mag-hotdog sandwich?" (I cooked steak, served with the usual boiled potatoes and boiled vegetables, which is the way my husband like his dinner most.)


I quipped," Anak, the best way to show God your appreciation for the food that He gives us is to eat what's on the table and avoid as much as possible wasting anything."


Quite reluctantly, he acquiesced, then, not looking directly into my eyes and with furrowed brows and puzzled look, he asked, "Ma, panong nanggaling ke God yung food? Di ba binili mo yung iba sa Hannaford, tapos yung iba sa garden mo galing? Tapos galing ke Grandma yung beef tsaka eggs natin, tapos yung milk galing ke Aunt Stacey?"


Is this scenario familiar to you? How do you approach it? How do you answer your child's questions?


Here's how I did it. I looked at it as another opportunity to teach my children about how the earth sustains us humans. What I told them was something like the stream of conversation presented below (and I have been repeatedly instilling the lessons in them)...


Do you believe that God created the Universe?

Opo.


Do you know that the sun and the earth and the other planets are in the Universe?

Opo.


Hindi ba, kaya tayo kumakain, para me energy kayo pag naglalaro, tumatakbo, nagba-bike, mag-pile ng wood, etc. etc.?

Opo.


Di ba pag di ka nakakain ng matagal, nanghihina ka, nauubos ang energy mo?

Opo.


Ganito kasi. Sa planet earth, the energy that we get ultimately comes from the sun, which is in the Universe that God made. But we can't go out on a sunny day and expose ourselves for a long time to try to get energy from the sun directly. That is not possible and will just create cancer of our skin. We have to get the energy indirectly. Here's how we get that energy.


Plants have the capacity to convert the sun's energy into a form usable to humans (and other animals). Some of that energy is stored in fruits (cucumbers, tomatoes, berries, apples, squash, zucchini), flowers (cauliflower, broccoli, squash), a bit in the leaves (pepper, spinach), some in their roots (like camote, potato, carrots, beets). Some plants we can't eat (grass, etc.) can be eaten by cows, goats, chickens, pork, deer, etc. which we can eat.


You see how the cows eat the grass and some other plants...


So we humans eat the stored energy in the plants' fruits and flowers and stems and roots,


Or we humans (and other animals in the upper level of the food chain) eat the animals that eat plants, like the cows that we call beef when it ends up on the dining table.


So if you want to make the same approach to your kids, please do so, and help them become more aware of how our very existence is sustained by the earth.

Here are some links about the


Food Chain and Food Webs (features an interactive food-web making that is printable)

and

Chain Reaction (What will happen if a living thing is removed in a food chain? Have fun with your kids trying this one.)

These will also help teach your children to respect other forms of life, because in so doing, we are preserving our very own species.

Isiningit ko po itong post na ito in between canning-related posts, despite this being a non-kitchen and a non-recipe post. I just felt the need to share this with mothers like me.


Articles of Note

Color Your Way to 5 A Day
More Color More Health


Teach kids about good food


Wednesday, September 15, 2004

Canning Materials

Okay...before I present the recipes that I used for canning, first we must address the materials that we need aside from the produce.

First we need jars and lids showed in the photo from my previous post. These should be washed with hot soapy water before use. Some recipes call for boiling the jars to sterilize them prior to canning, but the recipes I used needed no sterilization. The lids (which had the rubber lining that is responsible for the sealing) should be new, otherwise it might not seal. Screw bands can be re-used as long as they are not too rusty and do not have resistance upon screwing.

We need a kettle to boil water which we will use to fill the jars shortly before putting the food and for the screw bands and lids as well...


A stockpot for cooking large amounts of food if the recipe calls for it...


So far, with the recipes I tried, I just used the water-boiling canner type like this, none of the pressure-gauge or dial-gauge type (baka mabigla ang manang nyo). Actually since this is my first try, I had no equipment. I borrowed this from my mom (as well as the big stockpot).


Inside the canner is where this rack goes, where the food-filled jars are. It kinda reminded me of the bottle sterilizer we used for feeding babies...


These are the lids (with orange rubber lining on the periphery) and the screw bands (so that the cover is actually two-piece). I used a clamp instead of a magnetic picker (nahiya lang ako sa byenan ko na lahat na lang hiniram ko. Biro nga nila, alam na raw nila ang Christmas gift nila for me. Haha!)


This is a jar lifter (my Mom has been using this jar lifter for 40 years now. She said those that are available nowadays are not that durable). When using, make sure that the jar is fully supported by having the curves of the lifter UNDER the ridge, especially when removing just-processed jars.


Magnetic picker has a small magnet at the tip, which is used to pick up the outside part of the lid and the screw bands from the boiling hot water to the jars. It does not only protect your fingers from scalding, it also helps minimize contamination. To care for yout magnetic picker, refrain from storing it alongside a conductive material, as that might weaken the magnet. Posted by Hello


This is a food mill, which I used for pasta sauce. I found a recipe for hot sauce which I would like to try probably next week, and I will be needing this again.


All of these I borrowed from my mom (kapalmuks!). Alam nyo naman, nasunog ang dating bahay. Everything has to be bought new, but we can't do that at once (donations welcome! Haha!)

Of course, when all is canned you need a space to store these, so shelves are essential, as shown in my previous post. The shelf should be placed in a dark and cool place for longer shelf-life of the canned goods.

For those interested in canning, I will createhave created links on the lower right sidebar for my online resources after this post. One of my friends, bingbing, suggested before about extension links of USDA (thanks to you!) and I moved on from that, found other sites both government, educational institutions or personal endeavors of people concerned about the many bad ingredients found in the typical canned foods found in the grocery stores.

Sunday, September 12, 2004

Produce from the vegetable garden

The summer is almost over, and I am reaping the fruits of my toiling at my vegetable garden.


After 3 months of planting, weeding (almost every other day), hoeing (for disrupting the growth of the small weeds and keep them from seeding), watering (except during rainy days), I now enjoy veggies picked and eaten fresh (I love summer for that!).


Here are some cucumbers.


These smaller cucumbers were from my Mom's garden.


My green peppers...most of which I have already frozen as strips, unblanched/uncooked, just placed in freezer bags.


Quite fuzzy photo, the green fruits at the left are tomatillos, which, according to my friend Ana from Davao, grow as wild tomatoes in the province. I tasted them straight from the vine when yellowish, and they tasted like a cross between guava and tomatoes. And they are more solid than red tomatoes. They have a husk which has to be peeled first.


These are some of the jalapeƱo peppers.


Onions from my garden, some of which are larger than my fist.


ON the right is half a bushel of big paste tomatoes, and on the left, a bushel of regular tomatoes. The smaller basket behind are red potatoes, and the basket next to it are jars and lids. Everything in this photo are produce from Mom's garden that she no longer needs (and by the time I am posting this, she plans to give to friends the future harvest of tomatoes.)


What to do with all these veggies? I canned them, (or froze them) for veggie supply during the winter. 18 quarts of dill pickles (small cucumbers), 6 quarts of pimento pickles (bigger cucumbers), 4 quarts of hot pasta sauce, a quart of traditional tomato salsa, 20 quarts of tomatoes packed raw (1 quart will be good for sarciado recipes for a family of 4-5), 3 quarts of pickled jalapeƱo (Gary likes them. I don't. I am not sure if my recipe is the same recipe used by that restaurant where we ate.), 6 pints of tomatillo salsa (Gary tasted it for the first time and liked it tremendously as relish for his hotdog sandwiches.), and 6 half-pints of raspberry jam (we are consuming the last pint of strawberry jam that I made earlier.)


Now I wonder what to do once my own tomatoes are at the peak of harvest! I now have got enough stores of tomatoes and pasta sauces and pickled cucumbers and I have ran out of jars and lids! One thing I am sure of, I want to make another batch of pasta sauce (this time not as hot as the first batch) from those big paste tomatoes. But what to do with the other tomatoes? I can give them to my friend Ana and to her relatives, but I am not sure how much she's gonna take because her mom-in-law also gardens. Hah, I wish I could give these away to my fellow Filipinos. Oh well....


Recipes for canning coming up pretty soon! Posted by Hello

Wednesday, September 01, 2004

Blueberry Muffins

Two weeks ago I had the chance to pick blueberries from my Mom's garden. What is shown here were the blueberries left after I made blueberry muffins.

I used the recipe from Sarah's baking911.com (see the link on my sidebar). The batter was delicious! I sure am gonna use it again for other muffins using other fruits like peaches (which we have right now as I am posting this recipe). To those who will want to try making these, please do not copy what I did here: not using paper liners! The blueberries were so sticky when cooked that I had a hard time taking them off the pan without damaging them!

Posted by Hello
Custom Search